Monday, April 30, 2012

Better Late Than Never - Carrot Cake


So some weeks I am just a procrastinator, and others I am like a dog when it sees a squirrel.  Either way I have been meaning to post this cake I made at Easter, but time got away from me.  Over the years I have tried several Carrot Cake recipes, but this one, pardon the pun, takes the cake.


This looks so delicious that I may have to make it again!


The key ingredients.


The first time I made carrot cake I actually grated 3 cups of carrots.  My fingers and nails were orange for several days.  I learned to buy pre-shredded carrots and lightly chop them in the food processor to avoid the Oompa Loompa look.


This what your mixture should look like right before you add the carrots.


Then I added the carrots.  Thanks NN for the glass bowl for my mixer!


Because it was my perogative I decided to make 2 8-inch round cakes.


Oooh so pretty and they smell sooo good!


Now comes the best part - the icing!


Butter and Cream Cheese - could it get any better?


Yes,  with the addition of powdered sugar!


One word...YUM!


Carrot Cake
(Adapted from Sigrid's Carrot Cake a la the Pioneer Woman)

For the Cake:
2 C Sugar
1 C Vegetable Oil
4 Eggs
2 C Flour
1/2 t Salt
1 t Baking Soda
1 t Baking Powder
1 t Cinnamon
13 oz Grated Carrots

For the Icing:
12 oz Cream Cheese
12 oz (1.5 sticks) Butter
1 lb Powdered Sugar
3 t Vanilla
1 C Finely Chopped Pecans

Preheat oven to 350 degrees.

Mix together the sugar oil and eggs in a large bowl.  In a separate bowl combine the flour, salt, baking soda, baking powder, and cinnamon.  Add the dry mixture to the wet mixture in a couple of batches mixing thoroughly.  Add the carrots and mix well.

Pour into greased pan of your choice and place in the oven.  For my 2 eight inch round cakes it took about 25-30 minutes to cook completely.  You may have to adjust the oven temperature or time depending on cake size.

Cool completely.

Cream together the butter and cream cheese in a large bowl.  Then add the powdered sugar and vanilla to the mixture.  Last add the nuts.

Spread over cooled cake, and according to the Pioneer Woman you should eat, faint, and repeat!

Have a Great Week!

Monday, April 23, 2012

Did you know that alligators like marshmallows?

As many of you know we recently built a house in a nice master-planned community.  The community is really an awesome place (in the country) to come home to.  It has beautiful creeks and trails coupled with a very nature filled backdrop.  It is super serene and at night it sounds like a camp ground!  We even have a couple of peacocks that run around!


This is the view from one of our upstairs bedrooms.  It is simply beautiful.  Who would not want to have this in their life?  You can't see it, but I am raising my hand.  Please read on.


This is the same lake behind our house on a recent cloudy day.  Do you see anything out of place?  Look closer to see if you see Francis, our new alligator.  Yes I said new, meaning there have been more than one.


Luckily the Team Leader is safe from our latest inhabitant.


Why do we have an alligator in our lake you ask?  Well the lake is similar to the creek  where I walk the Team Leader every day.  One particular Saturday morning the three of us, the Nutrition Nazi, the Team Leader, and myself were out for our morning jog.  I usually let the Team leader stop and look over the edge to see the turtles that swim under the bridge, but this day we see an alligator swimming up.  CRAP!  Right about that time a father and his young daughter come along and say something to the effect of  'Too bad we don't have any marshmallows to feed the alligator.'  EXCUSE ME, Did I hear that right?  Are you morons really feeding an alligator marshmallows?  I guess they don't understand the consequences. 


This is what happens when you feed the wildlife, which is illegal in Texas, by the way.  They walk across your front porch and settle themselves in between your garage door and front door.  You back your car out of the garage and almost have a heart attack because this is one yard decoration you can live without.


For those of you seeing these pics for the first time, this 9.5 alligator decided to take up shop in our flower bed.  The game warden had to be called by the sheriff's department to come out and handle the situation.  The game warden said this is one of the most dangerous situations to be in because the gator felt totally comfortable around humans and that is typically when things go tragically wrong.

So the moral of this story is that no matter how appealing it sounds to feed the wildlife - DON'T DO IT!

This public service announcement has been brought to you by two people and a goldendoodle who don't care if they never see another alligator ever again.


Monday, April 16, 2012

Decisions, Decisions

Like most first-time parents we have been busy planning the baby's room. There are so many options these days and all it takes is money to make the wildest dreams come true. I really wanted to do as little as possible in the way of painting, etc, but after seeing the baby bedding against the wall I knew that we were going to have to paint.  The bedding and the walls seem to mesh together too much.  You can take a look at the current nursery here.  So we started by narrowing the paint down to four colors for the walls.  Take a look.


The choices from left to right on the top row are Stream and Ebbtide.  The lower row is Open Seas and Jet Stream.  Four VERY different blue options!


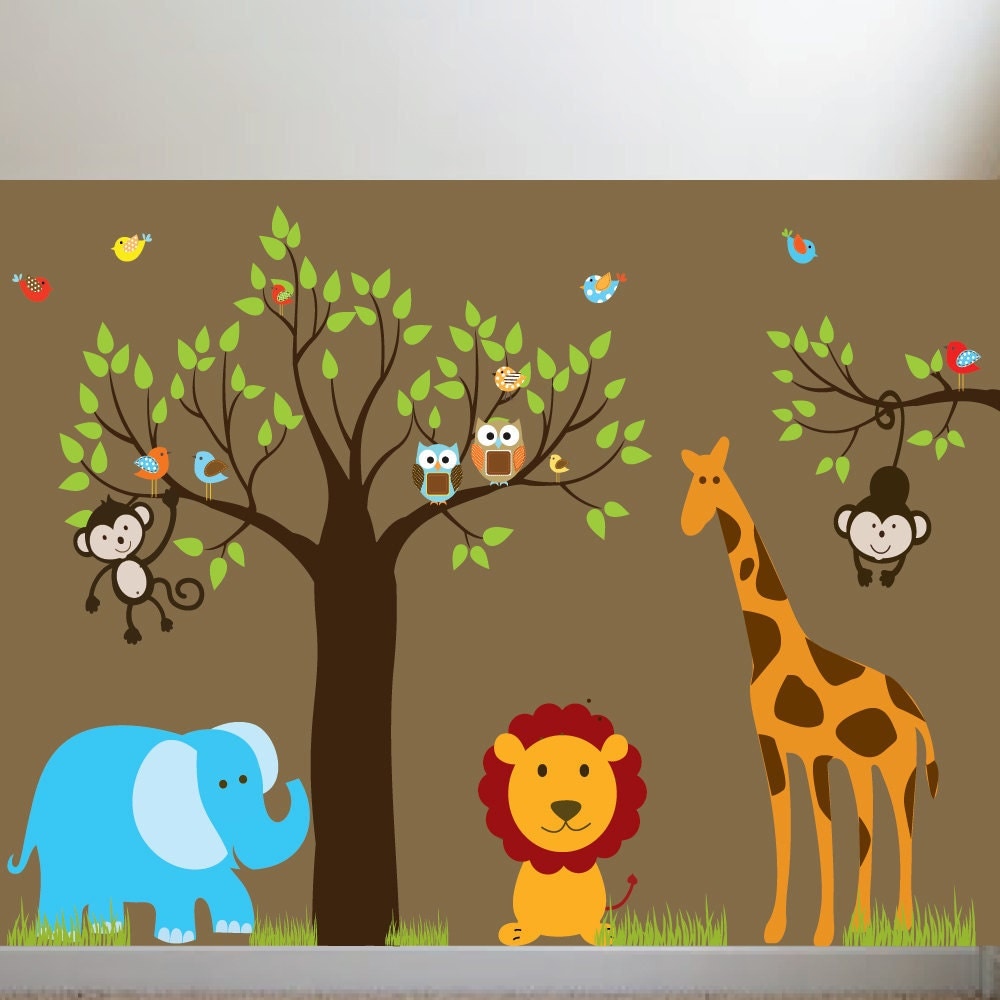
Something to keep in mind is that this decal which is VERY large is going on the walls.  I did have the manufacturer change the coloring on all of the blue animals so that we don't have color clash.  Tone on tone is not really my thing.  NN used to be bad about color clash, but has seen the light, for the most part, thanks to the ray of sunshine he married.


After much debate we decided on the color Ebbtide for the walls.  I know it looks a little crazy and bold, but I think once the decal is up it will come together nicely.  If not our painters will love us because we will be re-painting in a few years!


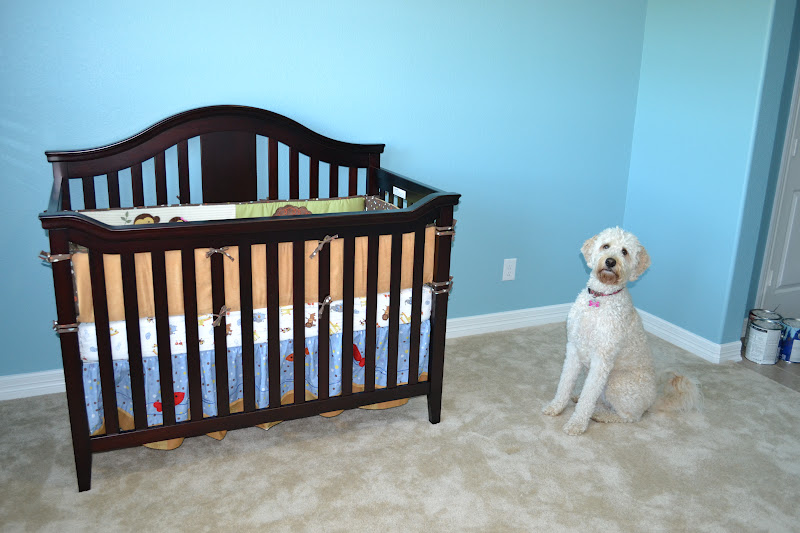
The Team Leader is taking her Big Sister role very seriously by guarding against intruders getting near the crib!  Well at least until someone rings the doorbell or she hears the peanut butter jar open.


We also picked up the dresser once the room was painted.  With all of the heavy dark furniture I think the blue will balance out.  I also think we already have a good amount of stuff to fill this thanks to the grandparents.  If you just said spoiled, you are not alone.


We actually got the shower curtain put up too!  I know this seems like a little feat, but it seems huge now that it is up. 

Hopefully we will be putting the decals up soon and I can post more pics!  Slowly but surely, we are getting there.  Just a few more months before all hell breaks loose!

Tuesday, April 10, 2012

She is not like a child to me

I have heard many people over the years say that I treat the Team Leader like a child.  I am here to tell you that simply is not the case.  She is not like a child, she is a child.  She is absolutely spoiled rotten and every bit of a handful, but being an only child, for now, I give in to most of our little Napoleon's demands within reason.  I also want to make it known that she got a Petsmart card from Grandma L so that she could pick out a toy.  I am clearly not alone in spoiling her.

So every Easter we (I) make a big production of it all complete with an Easter egg hunt!  Now before you go off and say that I have truly lost my mind, hear me out.  We (I) actually do several egg hunts a year because they keep her mind challenged and she is forced to use some energy to find treats, and not simply be given them for free.  And she actually gets excited and tries to peek (no joke) when I 'hide' the eggs.


Team Leader with her haul! The pink ball is already a victim of rough play!


Once released from her pretty pose, she broke into her basket, and yes she knows the basket belongs to her.


Jackpot - a new water toy!


Now comes the fun part - an Easter egg hunt outside with a little help from the Nutrition Nazi.


New yard, new hiding places.


She is so smart!
 

All her dad has to do is follow and open the eggs!


Towards the end she needed a little guidance, but still found it without it being pointed out!


Last one! YAY!

Yes the Team Leader lives the life of luxury - it's ok to be envious, I am!  If you ask nicely someone might hide Easter eggs with homemade treats in them for you too!  All you need it the right followers for your team!

Have a great week!

Tuesday, April 3, 2012

Coconut Macaroon Nests

Many years ago I came across what I consider to be a great Coconut Macaroon recipe.  Every year at Christmas I make a giant batch and hand them out to the coconut lovers in my life, and they always get rave reviews!  Lately I have been seeing pictures of bird nests in honor of Easter, made of various food items, with filling and candy in the center.  Somehow it came to me that what my ever-growing self needed was to combine this rich coconut macaroon with nutella and top it with candy.  The result was something that only happens in dreams!
   

The key players!  Simple, but delicious!


This is what your mixture should look like once all ingredients are mixed together.  It should be cohesive, but still a little loose - clear as mud right!


Here are the balls before I pressed in the center.  It was late when I was making these so it did not occur to me that you all do not have super-human eyesight and that the foil was a horrible backdrop.  Nonetheless you get the basic idea!


This is what the macaroon should look like once they have been baked.  Don't worry if they are still a little moist or loose when you move them to the cooling rack, everything will work out once they cool.


 And here is the finished project!  Be warned these are VERY rich!


And this monkey LOVES coconut macaroons almost as much as swimming.  She played the poor mistreated dog role the entire time I was working on these!  I felt a tiny bit of bad so I gave her half a plain one...it's almost Easter after all!

Coconut Macaroons

2 14oz bags of sweetened coconut flakes
1 14oz can of sweetened condensed milk
1/8 C Sour Cream
1 T Heavy Cream
1/2T Vanilla
Nutella
Easter Egg-shaped Candy

Preheat oven to 325.

Add one bag of coconut and all the other ingredients into the mixer bowl and turn on a slow speed to begin then increase to medium.  Once all ingredients are combined add the second bag of coconut while the mixer is running.

Use a small scoop to make the tightly-packed balls, and then press down in the center with your thumb.  You may have to work with the edges of the macaroon to keep get the right shape depending on the consistency of your mixture.

Bake @ 325 degrees for 10-12 minutes, or until the edges are light golden brown.  Remove to a wire rack to cool.

Once completely cooled, add a small spoonful of Nutella to the center of the macaroon and top with your favorite Easter egg-shaped candy.  Enjoy!


Monday, March 26, 2012

A Splash of Chaos

Last weekend we took the Team Leader to my parents' house.  Now she loves my in-laws for their love of all things deep-fried, but my mom is her most favorite person in the whole world.  She used to actually pee on the floor when my mom would come over.  Thank goodness that stopped!  Nowadays she is all about her grandma with the pool.  Ask her if she wants to go swimming and she will pace incessantly at the garage door.  She knows when we are within 10 minutes of my parents' house.  The following is what happens exactly 5 seconds after the front door is opened.


Larry (Sara-border collie), Curly (Team Leader), and Mo (Cash -Flat out goofy) wrestling over the same toy even though we have multiple water toys


Before I can even get the camera out the Team Leader has managed to jump in several times.  I think I may have mentioned her love for water a few times!


Even the bigun gets in on the action. 


She sure loves to fetch things in water.  It is all fun and games for the first 15 minutes, but the following 3 hours...not so much!  We've learned to work in shifts.


Sara NEVER gets in the water, but she is an excellent lifeguard!


Even the most dedicated lifeguard needs a break!


Once they are dry enough to come inside, they show off their skills...for cupcakes!

Time to hit the spa for rub-downs!  I like how they have their servants trained!  Sara is probably off making sure the cat does not escape the bedroom - good dog!

Hope you all have a good week filled with very little chaos!

Monday, March 19, 2012

Homemade Pasta Sauce

Several years ago I decided to learn some of the Nutrition Nazi's family recipes because I am a good family member like that!  One of the first recipes that I learned from NN's mom was Pasta Sauce.  This recipe used to seem a little daunting to me, but once I figured out how to plan for it as well as changed up the original recipe to my specific tastes, things went a lot smoother.  Now that I have been making this for years I am extremely hesitant to even purchase a jar of spaghetti sauce, let alone serve it to NN.  It is almost like staging a mutiny in his opinion.


These are the ingredients that you will need to make this delicious sauce!


I have standing disclaimer about my photography so please keep it in mind.  First saute the onions and bell pepper until they are translucent and wilted over medium heat.


The Nutrition Nazi family adds garlic to almost everything, so why should this be any different?  Add the boat-load of garlic to the onions and pepper.


Next add the tomatoes, sauce, and paste to the mixture and stir very well.


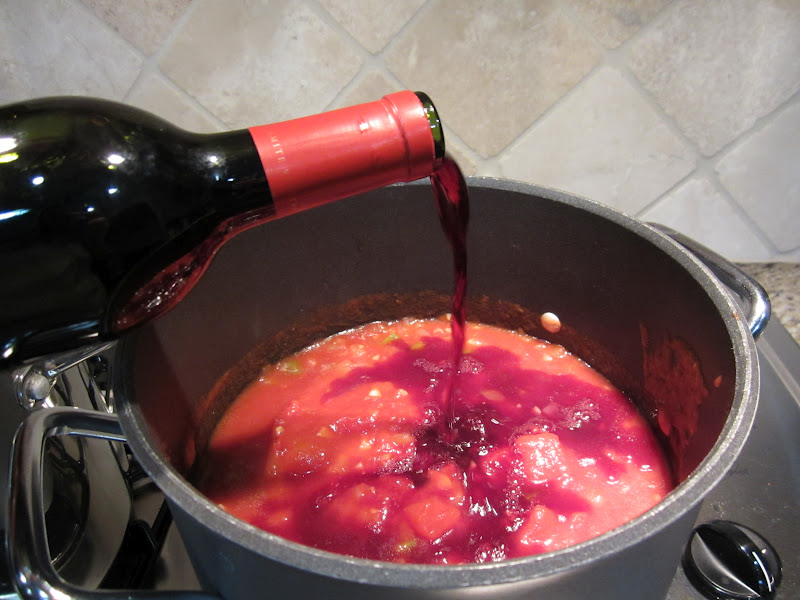
Now comes the best addition in my opinion - the wine.  My mother-in-law uses water in her recipe, but I thought this might be a fun change.  I typically add about half the bottle, and then let the wonderful aroma fill the house!  I only use Dynamite cab because of the awesome flavor that it gives the sauce.


Next add all the seasonings and stir very well.  The mixture generally needs to cook on low heat for at least 3 hours, but the longer you cook it, the better the flavor!


After all the waiting the sauce is finally done and ready to enjoy!

Pasta Sauce
 

Diced Tomatoes – 2-28 oz cans (56 oz total)
Tomato Sauce – 2-28 oz cans (56 oz total)
Tomato Paste – 2-12oz cans (24 oz total)
2 Onions, chopped
1 Green Bell Pepper, chopped
2-3 Bulbs Garlic, chopped
Garlic Powder
Onion Powder
2-4 T Oregano
Salt
Pepper, a pinch
2+ T Brown Sugar
1 Red Pepper Flake Packet (probably about a 1/2 -1 tsp)
2 C Red Wine (Cabernet Sauvignon – Dynamite)


Cover bottom of a large stock pot with olive oil and heat over medium heat.  Add onions and peppers to oil, and sauté until wilted, then immediately stir in garlic. 

Add diced tomatoes, tomato sauce, and tomato paste and stir to combine thoroughly.  Stir in red wine, and add more if necessary to thin out sauce.
      
Reduce heat to simmer and sprinkle garlic powder and onion powder to cover top of sauce twice.  Sprinkle salt to cover the top of the mixture and add a pinch of pepper. Sprinkle 2-4 Tbsp of oregano, depending on your taste.  Lastly add brown sugar and red pepper flake.

Cook over low heat for at least 3 hours, stirring well occasionally.  After the sauce is done you can serve it immediately or put it in mason jars for later.  The heat from the sauce will seal itself, so there is no messy canning, etc involved.  This particular recipe makes about 3-4 jars.